
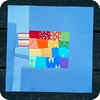
I don't know why the photo has come out like that! It looks like the picture has been pulled out length-ways! Here are the blocks in a different configuration:

The queen bee can decide whether she would rather use the blocks separately or jon them together to make one large block.
I thought I would share with you how I constructed these blocks.
Firstly, I tried out of few design ideas on paper:


I decided on the last concept (bottom right corner) and then just made up the construction process as I went along!
The first step in constructing the block was to create two identical half square trianglesn (HSTs) about 6 inches square:

I pressed the seam to the dark in both HSTs so that the seams would butt up against each other in construction.
Then I made a plastic template of the finished circle shape I wanted to use. I just traced the top of a drinking glass on to the plastic and cut it out. In hindsight, I could have just used the drinking glass as the template!

Then I traced around the template on to freezer paper. This is an awesome product, available at local quilting stores, that irons on to fabric and is then easily removed later. I cut out the freezer paper circle shape and ironed it on to the BACK of one of the half square triangles, as centred as I could get it (I just eyeball these things - I don't worry too much about precise measurements):

Then I cut around the freezer paper, leaving a quarter inch seam allowance:

Then I tacked the seam allowance down with contrasting thread (easier to see when you unpick it later):

The next step was to applique the circle to the other HST. First, pin the circle to the HST, eyeballing again to try and centre the circle on the block:

Then, using a tiny applique stitch, attach the circle to the HST. I like to secure the stitch to the back of the block first, taking a few stitches in the same spot over the top of each other. Then I come through the back on the block to the front of the block, picking up just a few strands of the circle fabric on the way. Then I stab back down through the base of the block to the back, taking care to stay slightly "under" the circle, hiding my stitches as I go. Then I come back up to the front of the block a millimeter or two further along, repeating the process. For this block, I used lime green thread around the green half of the circle, then dark purple thread around the other half of the circle, helping to blend in any visible stitches.

You will notice that I have stopped stitching about an inch or so from where I started. This is so I can remove the freezer paper before I complete the applique:


This is what the back looks like:


I think these blocks would look good with some decorative stitching around the circles as well, like a blanket stitch, but I will leave that up to the queen bee to decide.


7 comments:
Those are terrific blocks. I love the positive/negative effect. Great design, I am sure the queen bee will love them
Hi Sarah,
I was wondering how you had constructed these when I saw them on our flickr group..thanks for the great tutorial !
The secondary pattern formed looks great when they are joined together too !
x PJ x
They look fantastic Sarah - so neat!
Beautiful! Quite different to how I did the circles for Mum's quilt - I love how there are so many different techniques to do things. :-)
Wow very cool!! :) Christine
Hey, I found your blog via google (I love googling "quilting" and looking through the image results), and wanted to say that those are really neat! I think it'd be cool, though, if you stuffed the circles before completely appliquing them. Kind of like...what do they call it...biscuit quilting? Can't remember. Anyway, your quilting is gorgeous!
Nice! I have a book on circles somewhere...thank u for explaining ANZAC- I only know, for some reason, of a really nice biscuit (cookie) by that name. Now I am inspired to go find my book and make some circles!
Post a Comment